Mastering Ice Retention: 5 Common Mistakes to Avoid with Your Hard Sided Cooler
To maximize ice retention in hard-sided coolers, the most critical steps are pre-chilling your cooler, maintaining a 2:1 ice-to-contents ratio, and keeping the lid sealed as much as possible. Avoiding common pitfalls like using "warm" ice or draining meltwater prematurely will ensure your Chilly Moose stays cold for days, whether you're off-grid in the Rockies or lounging on a Muskoka dock. By understanding how rotomolded insulation works and managing the internal air temperature, you can easily double or triple the lifespan of your ice.
Whether you’re heading out for a week-long portage or just a weekend at the cabin, your hard-sided cooler is the heartbeat of your campsite. There’s nothing quite like reaching for a crisp, cold drink after a long day of paddling, or knowing your fresh-caught trout is perfectly preserved.
However, even the most advanced ice retention coolers need a little help from their owners. We often see folks frustrated that their ice isn't lasting as long as the "days-long" ratings suggest. More often than not, it isn't the cooler: it’s the way it was packed or managed.
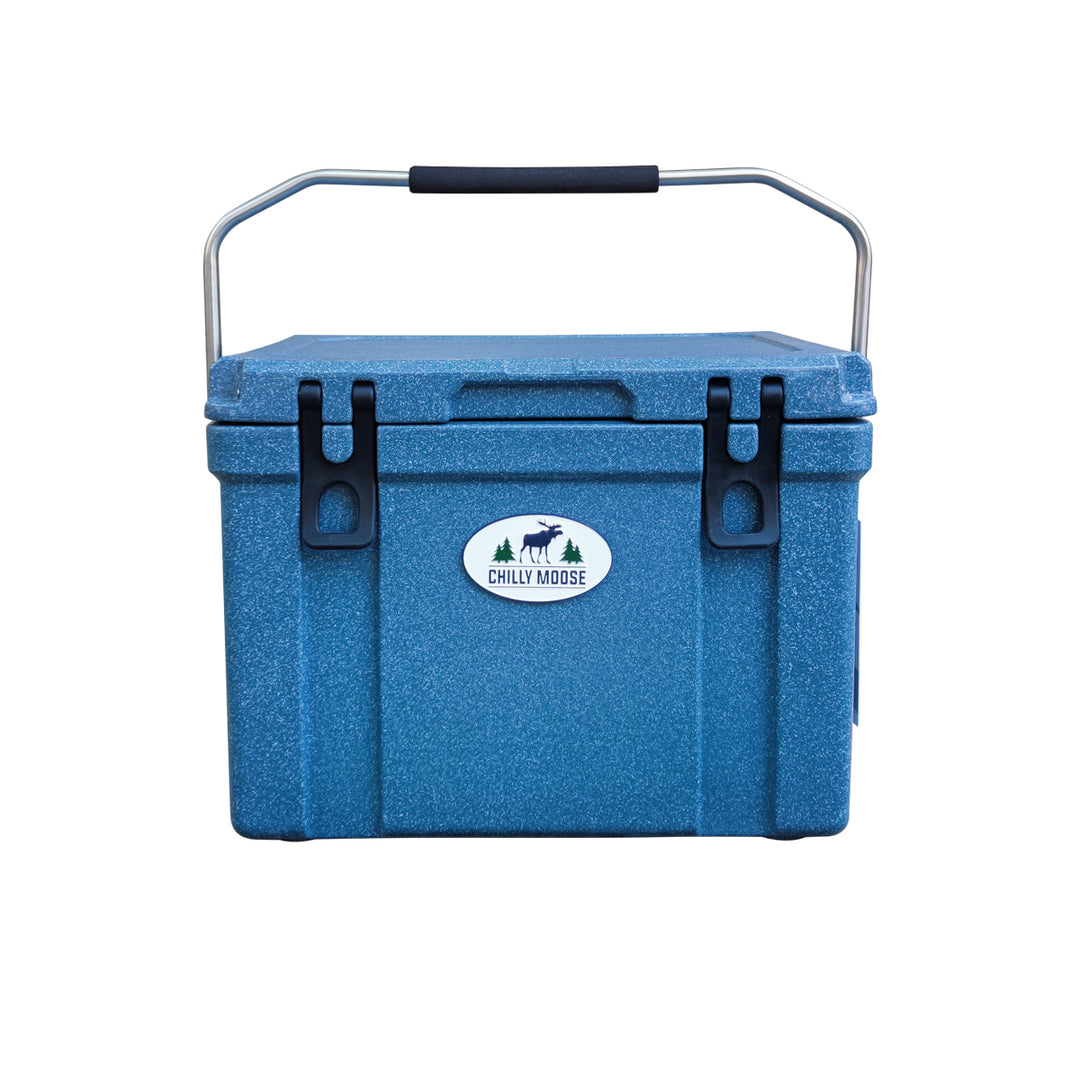
At Chilly Moose, we design our Chilly Ice Boxes to handle the rugged Canadian landscape, but even a moose needs a cool place to rest. Here are the five most common mistakes we see and how you can avoid them to master the art of ice retention.
1. Skipping the "Pre-Chill" Phase
This is the number one mistake people make. Imagine your cooler has been sitting in a hot garage or a shed all summer. The heavy-duty rotomolded insulation in a 25L Chilly Ice Box is designed to keep heat out, but it also holds heat if it starts off warm.
If you take a warm cooler and throw fresh ice into it, the ice immediately goes to work cooling down the walls of the cooler itself. You’ll lose a significant portion of your ice just bringing the internal temperature of the insulation down to "neutral."
The Fix:
Bring your cooler inside at least 24 hours before your trip. The night before you pack, throw in a "sacrificial" bag of ice or a couple of frozen water jugs. This "pre-chill" brings the temperature of the insulation down so that when you pack your fresh ice the next morning, it stays frozen much longer.
2. Ignoring the 2:1 Ice-to-Contents Ratio
We get it: you want to fit as many steaks, beers, and sodas as possible into your cooler. But if you fill your hard-sided cooler with 75% food and only 25% ice, you’re setting yourself up for a watery mess by day two.
Air is the enemy of ice retention. When you have a high volume of food and a low volume of ice, there is more air circulating inside the cooler. Every time you open the lid, that air is replaced by warm outside air, which the remaining ice must then work to cool down.
The Fix:
The gold standard for ice retention coolers is a 2:1 ratio: two parts ice for every one part food and drink. If you find you can’t fit everything you need with that ratio, it might be time to step up to a larger size, like the 55L or 75L Chilly Ice Box.
3. Draining the Meltwater Too Soon
It’s a natural instinct: you see water at the bottom of the cooler, and you want to pull the plug to "clean it out." Don't do it!
In a standard, cheap plastic cooler, you might drain the water to prevent the food from getting soggy. But in a high-performance, heavy-duty cooler, that meltwater is actually your friend. As long as the water is cold, it is much more effective at insulating the remaining ice than empty air would be. Water fills the gaps between the ice cubes, preventing warm air from circulating.
The Fix:
Keep the drain plug closed until you’re actually ready to unpack or if the water level is so high it’s threatening to seep into your sandwich bags. If you’re worried about soggy food, use Chilly Moose wire baskets to keep your dry goods elevated above the "ice bath."

4. Using "Warm" or Wet Ice
Believe it or not, not all ice is created equal. If you buy a bag of ice from a gas station that’s already dripping and slightly translucent, it’s already at its melting point (32°F / 0°C). This is what we call "wet ice." It won't last nearly as long as "dry ice" (ice that is well below the freezing point).
Furthermore, using only small cubed ice is a mistake if you’re going for longevity. Small cubes have more surface area relative to their mass, meaning they melt faster.
The Fix:
Use a combination of block ice and cubed ice. Block ice (which you can make at home using large Tupperware containers or clean milk jugs) melts much slower and serves as the "battery" for your cooler. Use cubed ice to fill the gaps around your drinks and food to ensure everything stays in direct contact with a cold surface. Always look for ice that is hard and "dry" to the touch.
5. Excessive Lid Opening and Poor Placement
Every time you open the lid of your hard-sided cooler, the heavy cold air falls out and is replaced by warm, humid air. If you have kids who like to stand with the lid open while they decide which juice box they want, your ice retention will plummet.
Similarly, where you put the cooler matters. Leaving a cooler on hot asphalt, in the back of a black pickup truck, or in direct Canadian summer sunlight is like putting it in an oven. The sun’s UV rays and the heat transfer from the ground will fight against the insulation all day long.
The Fix:
Be "strategic" with your lid openings. Know what you want before you open it, and close it immediately. If possible, designate one smaller cooler (like our 12L Chilly Ice Box) for drinks: which get accessed frequently, and keep a larger one for food that only needs to be opened a few times a day.
Pro Tip: Always keep your cooler in the shade. If there is no shade, throw a light-colored towel or a piece of foam over the top to reflect the sun.
Summary of Ice Retention Best Practices
To help you remember these tips on your next trip, we’ve put together this quick guide based on our Pack Like a Pro resources:
- Pre-chill: 24 hours in advance.
- 2:1 Ratio: More ice than stuff.
- Keep the Lid Shut: Only open when necessary.
- Don't Drain: Cold water insulates.
- Shade is Key: Keep it out of the sun.
Frequently Asked Questions (FAQ)
How long should ice last in a Chilly Moose hard-sided cooler?
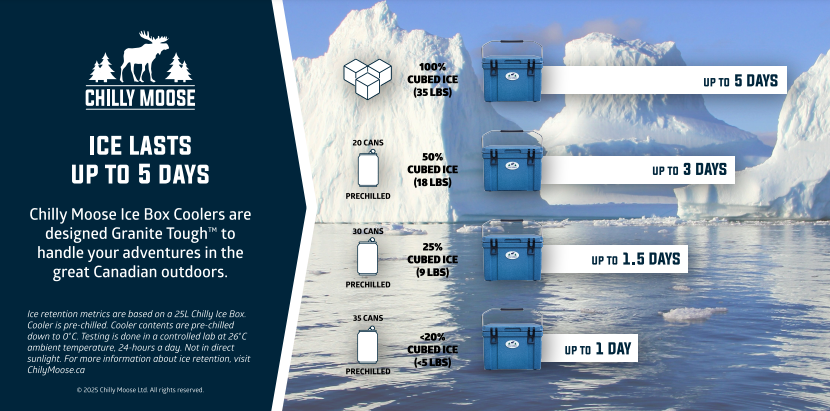
Depending on the model and how well you follow the packing tips above, our rotomolded Chilly Ice Boxes can hold ice for 3 to 10 days. Environmental factors like external temperature and how often the lid is opened play a huge role.
Should I use salt in my cooler to keep it colder?
Adding salt to your ice will lower the freezing point of the water (making it colder than 32°F), which can be great for quickly chilling drinks to an icy temperature. However, it will also cause the ice to melt faster. Use this trick for short parties, not for long camping trips.
Can I use dry ice in my Chilly Moose?
Yes! Our hard-sided coolers are dry-ice compatible. Just ensure you have a way for the CO2 gas to escape (don't lock the latches completely if using a large amount of dry ice) and never touch dry ice with your bare hands.
What is the best way to clean my cooler after a trip?
Use a mild soap and warm water. For stubborn odors, a mixture of water and baking soda usually does the trick. Always make sure the cooler is completely dry before storing it with the lid closed to prevent mold.
Ready for Your Next Adventure?
Mastering ice retention isn't rocket science, but it does require a bit of planning. By avoiding these five common mistakes, you’ll ensure that your Chilly Moose gear performs at its absolute peak, keeping your food safe and your drinks frosty from the first day to the last.
Looking to upgrade your outdoor setup? Explore our full range of Canadian-inspired hard-sided coolers and find the perfect fit for your next journey.


